AWS: 第6章Webサーバーを用意
ようやく本題に入っていきます。
SSH接続することができたので、Webサーバを構築していきます。
1.モジュールをインストール
rootユーザーに切り替えてインストールしていきます。
$ sudo -s必要となるモジュールのインストールします。
# yum -y update
# yum -y install selinux-policy-targeted policycoreutils-python
# yum -y install gcc kernel-devel kernel-headers gcc-c++ glibc-headers openssl-devel
# yum -y install git
# yum -y install readline-devel libxml2 libxslt libxml2-devel libxslt-devel
# yum -y install curl-devel
# yum -y install ImageMagick ImageMagick-devel
/etc/sysconfig/selinuxはデフォルトでSELINUX=disabledになっていると思いますが、一応確認します。
下記のDisabledが表示されたら大丈夫です。
# getenforce
Disabled
もし、Disabledになっていなければ、下記に変更します。
# vim /etc/sysconfig/selinux
SELINUX=disabled
2.Apacheのインストール
httpd(Apache)をインストールします。
# yum install -y httpd httpd-tools httpd-devel httpd-manualhttpdが正常にインストールできているか確認します。
# httpd -v
Server version: Apache/2.4.54 ()
Server built:   Jun 30 2022 11:02:23
所有者の変更と自動起動を設定しておきます。
# chown -R apache. /var/log/httpd/
# chkconfig httpd on
情報:'systemctl enable httpd.service'へ転送しています。
Created symlink from /etc/systemd/system/multi-user.target.wants/httpd.service to /usr/lib/systemd/system/httpd.service.
起動してみます。
# service httpd start
Redirecting to /bin/systemctl start httpd.service
apacheの動作確認します。
# service httpd status
Redirecting to /bin/systemctl status httpd.service
● httpd.service - The Apache HTTP Server
   Loaded: loaded (/usr/lib/systemd/system/httpd.service; enabled; vendor preset: disabled)
   Active: active (running) since 土 2023-02-04 16:50:31 UTC; 51s ago
     Docs: man:httpd.service(8)
 Main PID: 31304 (httpd)
   Status: "Total requests: 0; Idle/Busy workers 100/0;Requests/sec: 0; Bytes served/sec:   0 B/sec"
   CGroup: /system.slice/httpd.service
           ├─31304 /usr/sbin/httpd -DFOREGROUND
           ├─31305 /usr/sbin/httpd -DFOREGROUND
           ├─31306 /usr/sbin/httpd -DFOREGROUND
           ├─31307 /usr/sbin/httpd -DFOREGROUND
           ├─31308 /usr/sbin/httpd -DFOREGROUND
           └─31309 /usr/sbin/httpd -DFOREGROUND

 2月 04 16:50:31 ip-10-0-14-5.ap-northeast-1.compute.internal systemd[1]: Startin...
 2月 04 16:50:31 ip-10-0-14-5.ap-northeast-1.compute.internal systemd[1]: Started...
Hint: Some lines were ellipsized, use -l to show in full.
ちゃんと作動しているようです。
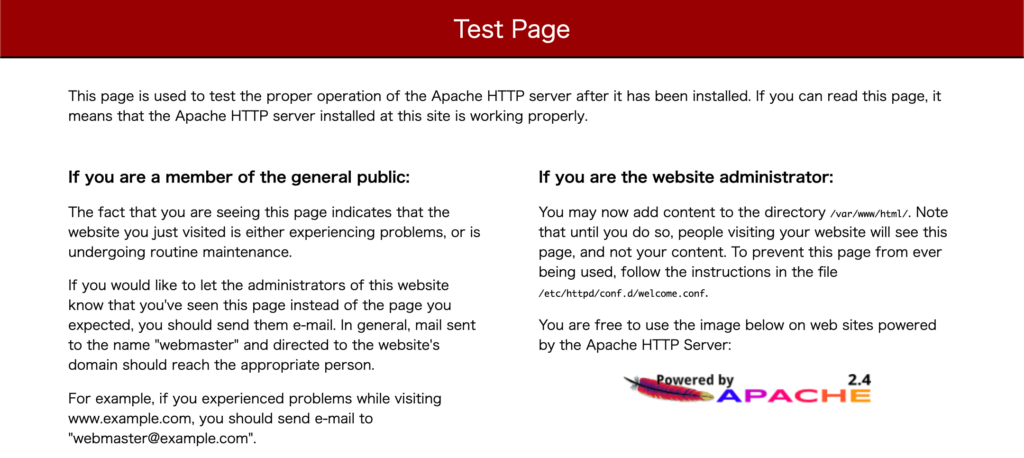
ブラウザで直接IPアドレスを叩いて、下記の画面が表示されればApacheのインストールは完了しています。

3.独自のHTMLを配置
HTMLファイルがないので、index.htmlを作成して配置します。
# vi /var/www/html/index.html今回はテストなので、下記の内容をindex.htmlに入力します。
<!DOCTYPE html>
<html lang="ja">
  <head>
    <meta charset="UTF-8">
    <meta name="viewport" content="width=device-width, initial-scale=1">
    <meta name="description" content="">
    <meta http-equiv="X-UA-Compatible" content="IE=edge">
    <title>Apache TEST</title>
  </head>
  <body>
    <h1>Successful Access!</h1>
  </body>
</html>
もう一度、ブラウザで直接IPアドレスを叩いて下記ページが表示されれば完了です。

次は、ロードバランサーの設定を行なって行きましょう。


